Vacuum Bagging
![]()
Vacuum Bagging |
|
by Gordon Cook
|
The article appeared in the Falco Builders Letter, December 2006 |
A method of vacuum-bagging fiber glass fairings, wheel well and gear doors using readily available materials and equipment was shown to me by Robert Carey, a sheet metal man with Air Canada. Although this method isn’t as good as using a proper vacuum pump and valve set up, it’s much better than trying to force wetted out fiber glass into a mold and have it stay there until set. It also forces out excess epoxy, thereby producing a lighter fairing.
Small parts like the wing fairings can be done in a ziplok bag while the larger ones will require sheet plastic formed into a bag. The following is the method and sequence for small parts. Rule #1 is to have all material and tools at hand before starting.
After making a mold of the part from a plug fashioned from wood or other solid material, lay up 5 or 6 layers of 9 oz. cloth to make the mold. Vacuum bagging at this point should be done to ensure a quality mold. When the mold is set, remove from the plug, strip the peel ply and soaker cloth and sand the inside of the mold with up to 1200 grit sandpaper to ensure it’s smooth.
|
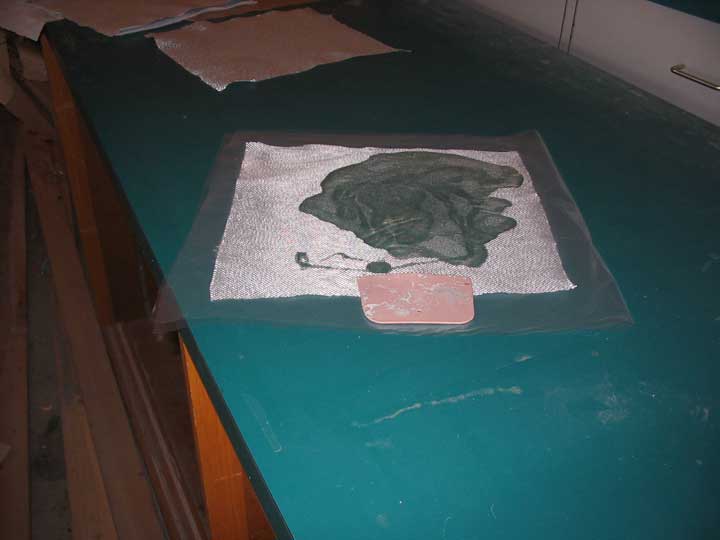
The plastic under and over the fiberglass. I use a plastic spreader to wet out the glass. |
Apply mold release to the mold per manufacturers instructions.
The following photos show the lay-up of the lower rudder fairing that was done on the plug rather than make a mold. The only drawback to this method is the surface that’s left is rough and will require smoothing to obtain a good finish. The mold method ensures a surface on the finished product that will require little sanding and filling. The drawback is having to make a mold. I used five or six layers of 9 oz. cloth to make the mold.
Here are the steps after the mold is complete.
1. Cut the fiberglass cloth (usually three layers of 9 oz.) to the shape of the mold. The plug or the mold will serve as a pattern.
2. Cut the bleeder cloth (one layer) to the shape of the fiberglass with about 1/2” margin all the way around.
3. Cut the soaker cloth (one layer) to the shape of the fiberglass and a little larger than the bleeder cloth.
4. Cut a rectangular piece of 4 mil plastic about 4” wider than the fiberglass and twice as long plus a couple of inches.
5. Place one layer of fiberglass on the plastic near the edge and apply sufficient epoxy to wet it out.
6. Fold the plastic over the fiberglass and squeegee until completely wetted out.
7. Open up the plastic and place the second piece on the first and apply epoxy.
|
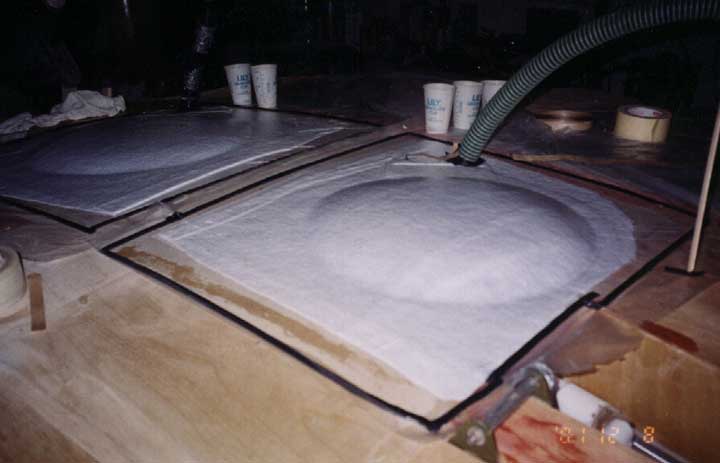
Vacuum cleaner hose attached to the plastic. Note the gray glaziers tape sealing the hose. The glaziers table around the perimeter of the plug isn't necessary if a plastic bag is used. |
8. Fold the plastic back over both pieces and squeegee, the same for the third piece of fiberglass.
9. Open the plastic and either cut the top piece of plastic off or just fold it.
10. Place the three layers of wetted out fiberglass into the mold and press it firmly into place and remove the plastic.
11. Place the bleeder cloth on top of the fiberglass and the soaker cloth on top of that and press into the mold.
12. Place the mold into the ziplok bag and seal. I used 2” clear plastic packing tape to further seal the bag. It’s very important to get to get a good seal.
13. Cut a small “X” in the bag (about 1/4”) where you will be attaching the vacuum cleaner hose.
14. Place glaziers tape around the end of the hose. This will provide the adhesion between the hose and the bag and also seal the hose to the bag.
15. Turn on the vacuum and leave it on at room temperature or warmer for about 1 to 3 hours or until the epoxy has set up sufficiently to hold it’s shape in the mold.
16. Wait at least 24 hours before removing from the mold.
17. Remove and discard the peel-ply and soaker cloth.
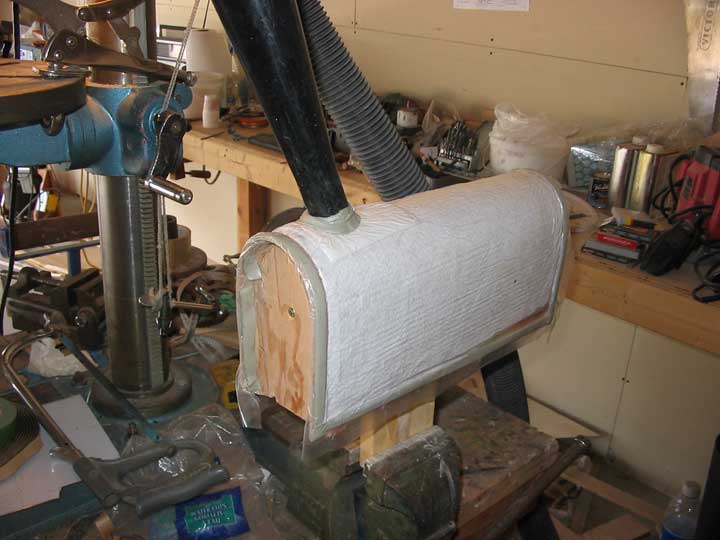
The fiberglass, peel-ply and soaker cloth were laid up over a plug constructed of styrofoam.
On top of that 2 mil plastic was placed and sealed with black glaziers tape. The aircraft was up side down at this point.
|
This photo shows the vacuum bagging of the wheel well doors. |
|
|
![]()