Fiberglassing the Airframe
![]()
Fiberglassing the Airframe |
|
by Gordon Cook
|
The article appeared in the Falco Builders Letter, December 2006 |
The following is a method I used to apply the protective coating of lightweight fiberglass to the airframe. It provides a glass-like surface that requires very little prep work for painting, providing, of course, the plywood covering has been adequately filled and sanded.
The following are the steps in sequence to follow:
1. Cut the fiberglass cloth to the size and shape of the area to be covered.
|
The fiberglass cut to size and placed in position ready for epoxy. |
2. Cut a piece of 4 mil clear plastic sheeting a little larger than the fiberglass. Tape one edge to the airframe just beyond where the fiberglass will be placed and fold out of the way. Clear plastic packing tape works well. I have found 2 mil to be too light and 6 mil is too heavy to get a good result.
3. Place the fiberglass cloth where it is to go.
4. Mix enough epoxy to thoroughly wet out the fiberglass and pour it on the fiberglass.
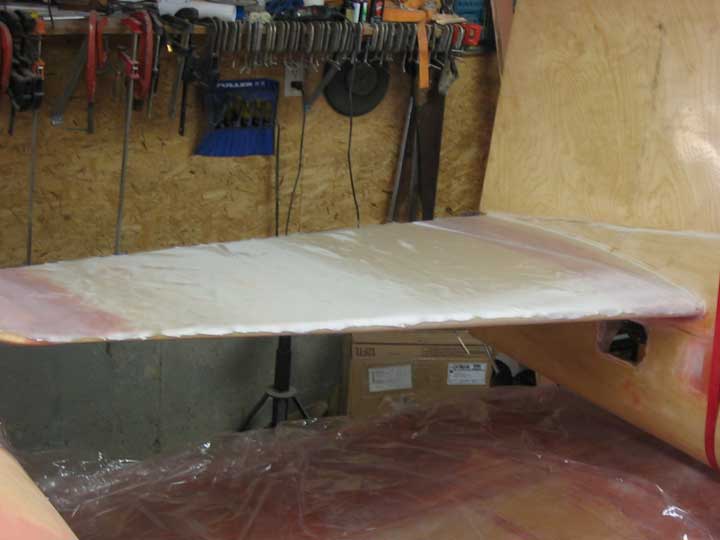
5. Wet out the fiberglass with a plastic spreader then draw the plastic firmly over the fiberglass.
6. Using a plastic spreader, squeegee the epoxy from under the plastic sheet drawing it away from the taped edge. Don’t press too hard or the plastic will ripple or tear. After squeegeeing, tape may be used to pull the plastic tight or to remove ripples. If rippling occurs and it is impossible to remove, just leave it and sand out the imperfection after the epoxy is set.
It is also important to remove all the bubbles from under the plastic. They can be hard to see, but will leave areas that will require attention later.
7. After the epoxy is set simply remove the plastic and if there has been no rippling, tearing or bubbles left under the plastic the surface should be as smooth as glass.
I found at first about nine or ten square ft. were all I could comfortably do, but as I gained a little experience I found I could do a little more. If you have the help of a couple of others then you may want to try a larger area such as an entire wing.
Here’s how I envision it being done. With the glass and plastic cut to size and the plastic taped along the wing root, roll the plastic so it can be unrolled over the wetted out glass. The glass can then be positioned on the wing and the first four feet or so wetted out. The plastic can then be placed over the wetted glass and squeegeed, in the meantime more glass can be wetted. A third person can be used to mix epoxy as required and help the other two.
It’s important not to mix too much epoxy at one time or it will heat in the pot and “kick off” in just a few minutes instead of an hour or so. If you use the West System epoxy there are two different types of hardeners, one sets up faster than the other. For glassing the airframe I recommend the slower setting hardener, it gives you more time to work before starting to set and does just as good a job.
I have never tried the latter method of laying down large areas so I don’t know how well it will work, however I do know the first method works.
|
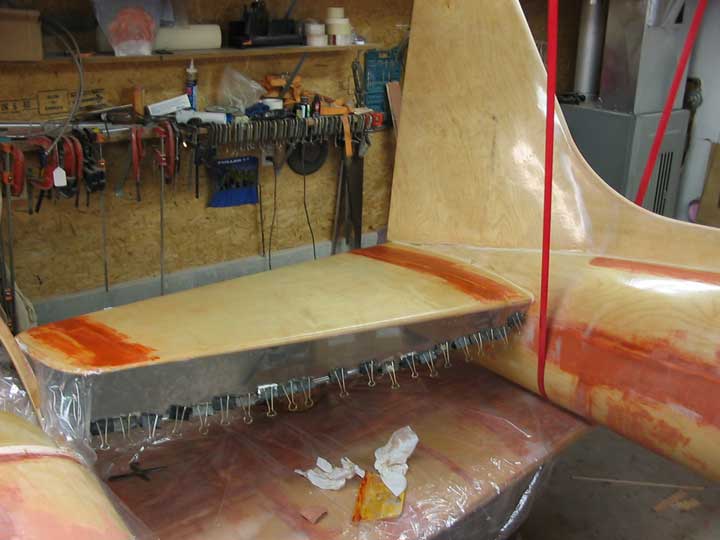
The plastic, which has been taped to the vertical surface of the stabilizer trailing edge, after squeegeeing out excess epoxy. The large paper clips attached to the plastic along the leading edge are to provide weight to ensure the fiberglass stays adhered to the leading edge. |
|
|
![]()