Craig Bransfield's
Rib Templates
![]()
Craig Bransfield's
|
|
|
From "Construction Notes" Falco Builders Letter, March 1990 |
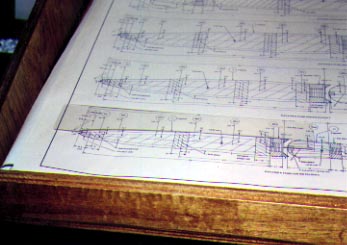
Craig Bransfield sent along a number of photos and descriptions of some techniques he has developed. Craig made some Lexan templates to fit to the outside of the stabilizer ribs during float sanding to check for a precise airfoil shape per the blueprints. Craig took his drawings to his local blueprinter and had copies of the drawings made. He glued these to Lexan that still had the protective paper on it, using 3M 77 spray adhesive.
Craig first drilled a hole at the leading edge to approximately match the leading edge radius, and then cut out the shape with a scroll saw or band saw, depending on how much curve was involved. The inside curve was then cleaned up with a fine-toothed die-grinder burr bit, then he peeled the protective paper off and checked the curve against the original drawing. Craig used this to check that the airfoil contours, top and bottom, left and right, were all the same.
When I need to make a template like that, I prefer to use acrylic, because it sands nicer than Lexan. I also prefer to scuff-sand one side of the acrylic and then draw directly on it. I find this easier and more accurate that pasting a drawing on the plastic. Second, if you are going to sand acrylic on a belt sander, I find it important to leave the protective paper on the bottom until all sanding is finished. Acrylic melts as it is sanded, and for some odd reason the slag breaks away cleanly and neatly when the paper is still in place and if the paper is removed it doesn't.
I'll also mention that this business of making a template to fit each
rib is overkill, and you don't really have to do this. Most builders just
glue the ribs in place and smooth things out by float sanding. At some point
you stop looking at the drawings, and you accept the shape as sculpture-sand
it smooth and skin that sucker.

The blueprint and the piece of Lexan.
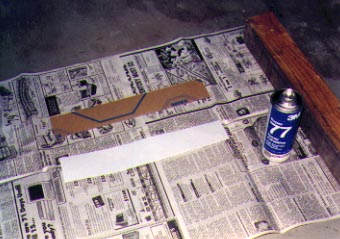
Applying the adhesive to the back of the blueprint.
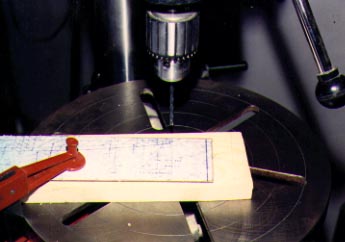
Drilling a hole for the leading edge radius.
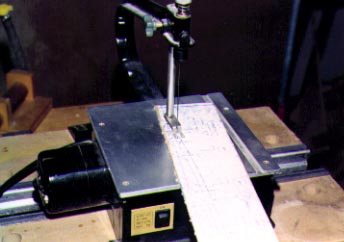
Sawing the shape.
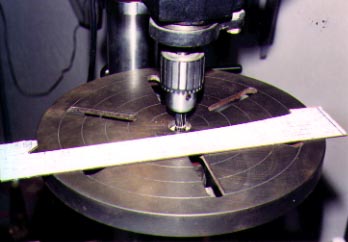
Cutting and polishing the final shape.
Checking the shape.
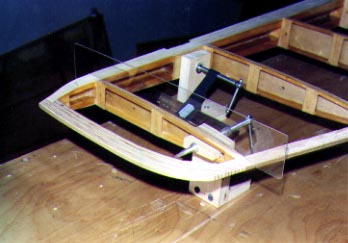
Using a template on the stabilizer.
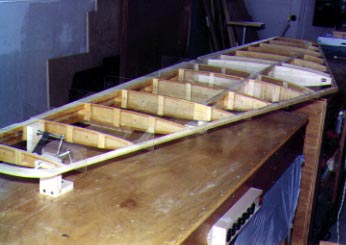
Here Craig has a template at each rib location.
![]()